A/C System Wiring Diagram
2.3L

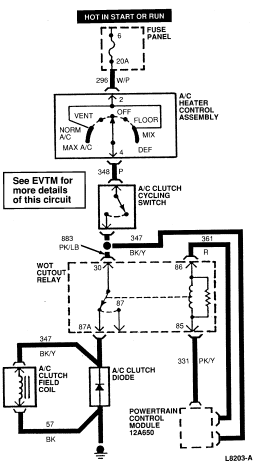
5.0L
Section 12-00: Climate Control System—Service | 1993 Mustang Workshop Manual |
Refer to the Electrical and Vacuum Troubleshooting Manual for schematic
and wire color information, system electrical wiring and continuity tests. The
blower switch chart also provides blower motor voltage and current information
for each blower switch position.
A/C System Wiring Diagram
2.3L
5.0L
 CAUTION: Never manually operate any vacuum motor or vacuum motor controlled door—this may cause internal damage to the vacuum motor diaphragm.