Section 07-01: Transmission, Automatic—AODE | 1994 Mustang Workshop Manual |
| Description | Tool Number |
|---|---|
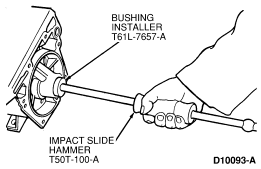
| Bushing Installer | T61L-7657-A |
| Impact Slide Hammer | T50T-100-A |
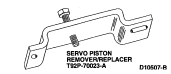
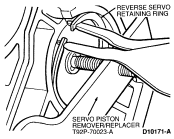
| Servo Piston Remover/Replacer Tool | T92P-70023-A |
| Gauge Bar | T80L-77003-A |
| Shift Lever Seal Replacer | T74P-77498-A |
| Servo Piston Remover/Replacer | T92P-70023-A |
| Gear Piston Sensor Adjuster | T93P-70010-A |
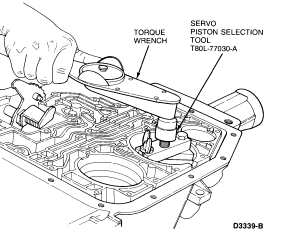
| Servo Piston Selection Tool | T80L-77030-A |

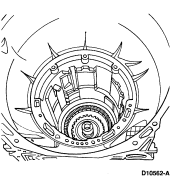
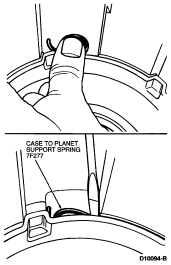
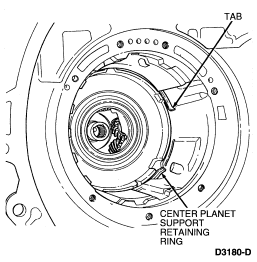
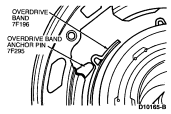
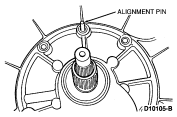
NOTE: Forward planetary assembly and planetary gear support assembly cannot be installed unless the notch cut in the planetary gear support assembly is aligned with the overdrive band anchor pin (7F295). Top of planetary gear support assembly should be below snap ring groove.
Align notch in planetary gear support assembly with overdrive band anchor pin.
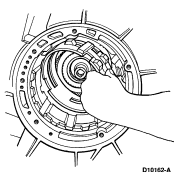
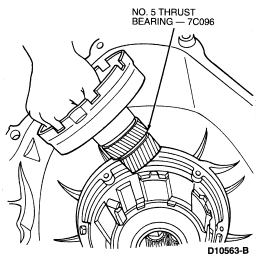
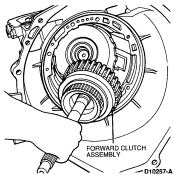
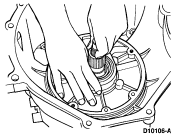
Rotate the output shaft, if necessary, to align the planet carrier splines with the direct clutch hub splines.
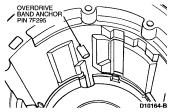
NOTE: Forward planetary assembly and planetary gear support assembly cannot be installed unless notch cut in planetary gear support assembly is aligned with overdrive band anchor pin .
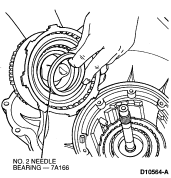
NOTE: Wiggle the output shaft while engaging the reverse clutch splines. Make sure the reverse clutch cylinder lugs are completely seated in the notches of the reverse clutch gear and shell (7A019).
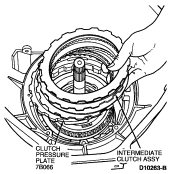
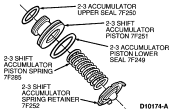
Intermediate Clutch Selective Steel Plate Procedure
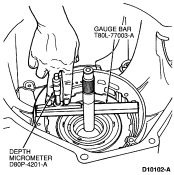
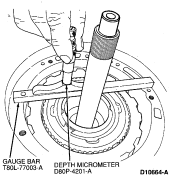
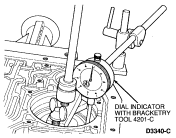
NOTE: Maintain downward pressure on clutch pack while measuring depth.
Set the gauge bar across the pump case mounting surfaces. The depth at the intermediate clutch separator plate is:
Check the clearance again 180 degrees opposite to ensure the average depth is within tolerance.
If the depth is not within tolerance, the following size
selective steel plates are available:
| Selective Steel Plates |
|---|
| 1.80-1.7mm (0.071-0.067 inch) |
| 2.05-1.95mm (0.081-0.077 inch) |
| 2.31-2.20mm (0.091-0.087 inch) |
| 2.56-2.46mm (0.101-0.097 inch) |
Install correct plate and check clearance.
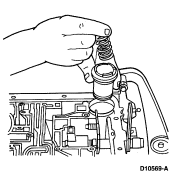
Transmission Selective Thrust Washer Procedure
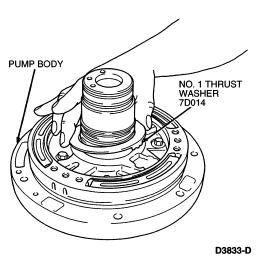
Place transmission in the horizontal position. 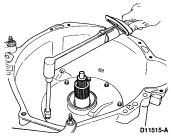
NOTE: Retainer is secured by main control.
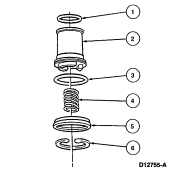
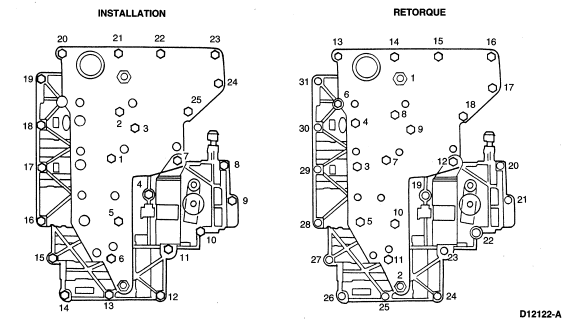
| Item | Part Number | Description |
|---|---|---|
| 1 | 7F248 | Accumulator Piston Seal |
| 2 | 7F251 | Accumulator Piston |
| 3 | 7F249 | Lower Accumulator Seal |
| 4 | 7G267 | 1-2 Accumulator Outer Spring |
| 5 | 7G300 | Cover and Seal Assy |
| 6 | 7384 | Accumulator Piston Retaining Ring |
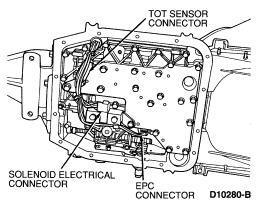
NOTE: Tab on connector is secured by main control.
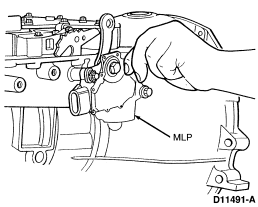
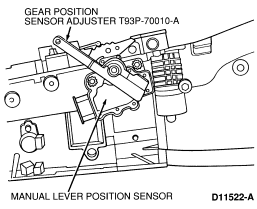
NOTE: PARK is the last detent when the manual control lever is full forward. Return two detents toward output shaft for NEUTRAL.
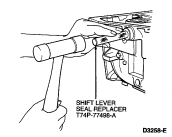
Insert Gear Position Sensor Adjuster T93P-70010-A into slots.
Align all three slots on manual lever position sensor with three tabs on tool.