Section 03-03: Engine Cooling | 1994 Mustang Workshop Manual |
REMOVAL AND INSTALLATION
Radiator Tank
Removal
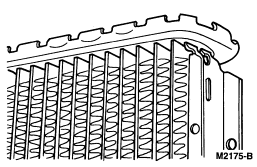
The radiator tanks are moulded glass-filled nylon and are attached to the
core header by bending the header tabs over the foot (edge) of the tank.
NOTE: The tabs on the vacuum-brazed aluminum radiator (8005)
are easily work-hardened and require special attention
to prevent tab damage.
When removing a radiator tank, a screwdriver or one of the various
special tools available can be used to open the header tabs. Some of these
tools, including a screwdriver, may cause a small section of the header side to
bend with the tabs as they are opened. This slight deformation is permissible,
provided the tabs are opened only enough for tank removal. The header sides
will usually return to the normal position when the tabs are recrimped during
tank installation.
Procedures given are for tank removal using a screwdriver or a Borroughs
Tool BT-8260 or equivalent. Follow manufacturer's instructions for other
radiator tab opening and closing tools.
With Screwdriver
NOTE: Bend (open) the tabs only enough for tank removal.
- Insert the end of a medium-tip screwdriver between the end of the header
tab and the tank. Then press the screwdriver blade against the tank to bend
(pry) the tab away from the tank edge. Repeat this procedure for each tab.
- Lift the tank from the core header when all of the header tabs are bent
away from the tank edge.
- Remove the O-ring seal from the header.
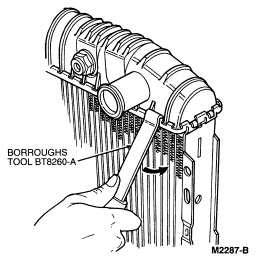
With BT-8260
- Insert the end of Borroughs Tool BT-8260 or equivalent between the end of
the header tab and the tank. Then push the tool handle down toward the core to
bend the tab away from the radiator tank. Do not open the tabs
more than is necessary for tank removal.
- Repeat Step 1 for each header tab. Then lift the tank from the header.
- Remove the O-ring seal from the header.
Installation
NOTE: If any header tabs are missing from an aluminum core, the core should be
replaced.
- Inspect the seal surface of the radiator core header to ensure it is clean
and free of foreign material or damage.
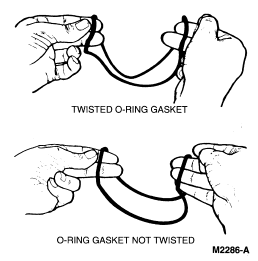
- Check the new O-ring gasket to ensure it is not twisted.
- Dip the new O-ring gasket in Premium Cooling System Fluid E2FZ-19549-AA or
B (in Canada, Motorcraft CXC-8-B) or equivalent meeting Ford specifications
ESE-M97B44-A and ESE-M97B43-A and place the gasket in the header groove.
- If the outlet tank is being replaced and is equipped with a transmission oil cooler (7A095)
, transfer the transmission oil cooler from the replaced
tank to the new tank as outlined.
- Position the tank to the header, using care not to scratch the tank sealing
surfaces with the header tabs. Ensure the top and bottom of the tank is
positioned properly with the other tank.
- Clamp the tank in position on the header with two header clamps. Tighten
the header clamps to compress the O-ring gasket.
- If locking-type pliers are used to bend the header tabs over the edge of
the tank, install a hex nut on the plier's adjusting screw.
- WIth the jaws of the locking-type pliers closed and locked, turn the
adjusting screw to position the jaws against the shank of a 13/32-inch drill
bit. Then tighten the hex nut on the adjusting screw against the handle to lock
the adjustment in place.
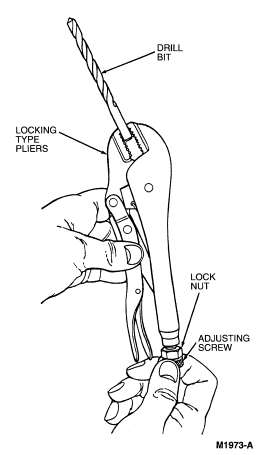
- Squeeze the header tabs down against the lip of the tank base with the
locking-type pliers while rotating the pliers toward the tank.
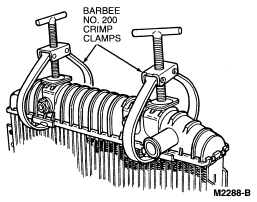
- If a special crimping tool is used such as the one shown, follow the
manufacturer's instructions. It is important that the assembled height of the
crimp be 10.9mm (27/64 inch) when measured from the bottom of the header to the
top of the tab.

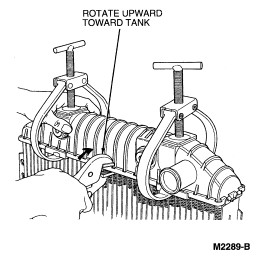
- Remove the header clamps from the radiator
and squeeze the header tab(s) down that were behind the
clamps.
- Leak-test the radiator
at 138 kPa (20 psi). Most minor leaks at the header to
tank seal can be corrected by again squeezing the header tabs down against the
tank lip in the area of the indicated leak.
