Section 12-03C: Compressor and Clutch—6P148 | 1993 Mustang Workshop Manual |
Tools Required:
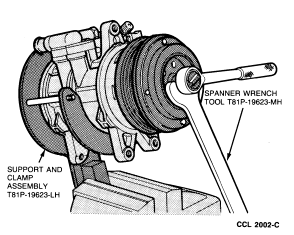
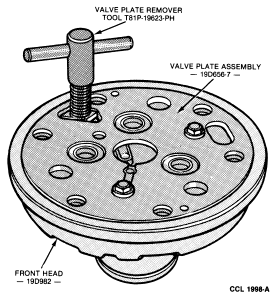
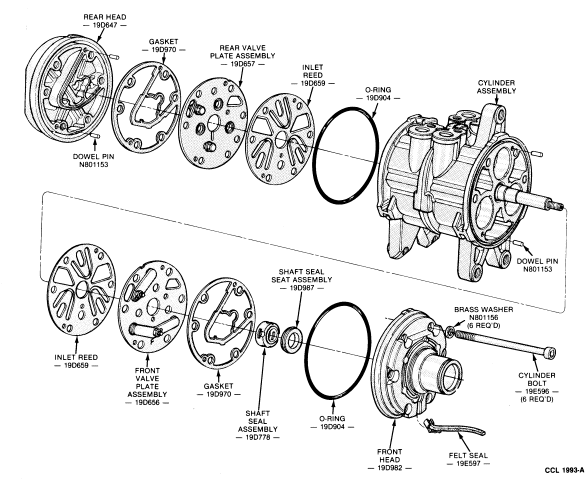
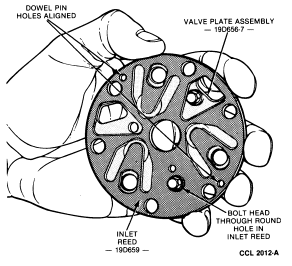
Removal
NOTE: Use extreme care not to damage any sealing surfaces.
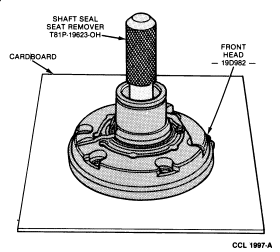
Installation
DO NOT CUT the transparent protective cover but peel it back from the backing to expose the seal and seat.
NOTE: DO NOT TOUCH the sealing surfaces of the shaft seal or seal seat.
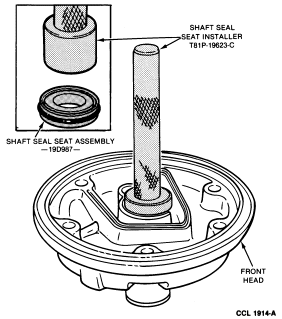
NOTE: Avoid handling the carbon sealing surface of the seal assembly to prevent damaging the surface. Use extreme care to keep the seal and seal seat clean at all times.