| Item | Part Number | Description |
|---|---|---|
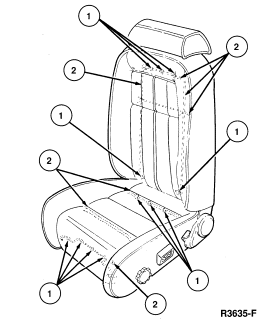
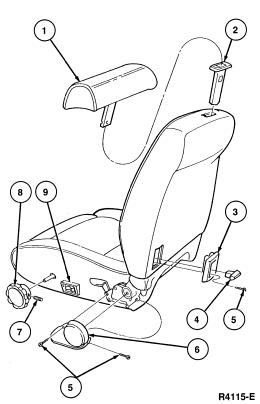
| 1 | 611A08 | Head Restraint |
| 2 | 610A16 | Head Restraint Guide Sleeve |
| 3 | 62672 | Bezel |
| 4 | 62762 | Latch Handle |
| 5 | N610017-S2 | Screw (3 Req'd Each Seat) |
| 6 | 62768 | Lower Latch Cover |
| 7 | — | Setscrew |
| 8 | — | Cushion Pad Adjusting Knob |
| 9 | 14B711 | Lumbar Support Pad Switch |