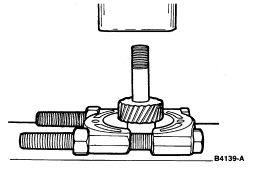
 CAUTION: Do not attempt to replace stator without an arbor press.
 Section 03-07A: Distributor Ignition (DI) | 1993 Mustang Workshop Manual |
Tools Required:
Removal
CAUTION: Do not attempt to replace stator without an arbor press.
NOTE: Hold gear to loosen armature screws. Do not hold armature.
| Item | Part Number | Description |
|---|---|---|
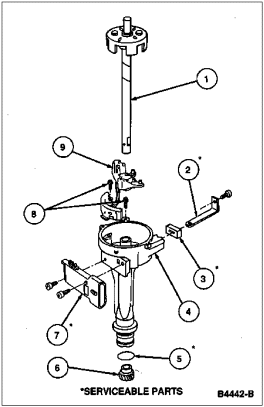
| 1 | — | Shaft Assy |
| 2 | — | Octane Rod |
| 3 | — | Grommet |
| 4 | — | Distributor Base |
| 5 | — | O-Ring |
| 6 | — | Drive Gear |
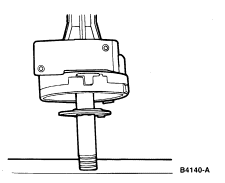
| 7 | 12A297 | Ignition Control Module (ICM) |
| 8 | — | Screws (2 Req'd) |
| 9 | — | Stator Assy |
Installation
NOTE: The hole in the shaft and gear must be lined up as accurately as possible to ensure ease of roll pin insertion.
NOTE: If the gear holes do not align, the gear must be removed and repressed on. A drift punch will not align the holes.
CAUTION: If gear is damaged, do not replace gear, serious engine damage may
result. Replace complete distributor assembly.
NOTE: If the armature contacts the stator, replace the entire distributor.