Section 03-04A: Fuel Charging and Controls—2.3L | 1993 Mustang Workshop Manual |
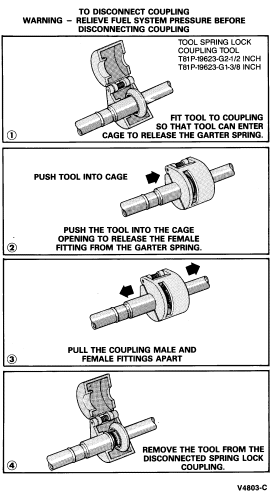
Tools Required:
NOTE: If subassemblies are to be serviced and/or removed, with the fuel charging assembly mounted on the engine, the following steps must be taken:
NOTE: Not all assemblies may be serviceable while on the engine. In some cases, removal of fuel charging assembly may facilitate service of various subassemblies. To remove entire fuel charging assembly, the following procedure should be performed.
Removal
NOTE: Injectors can be removed from the fuel supply manifold at this time by exerting a slight twisting/pulling motion.
NOTE: The front two bolts also secure an engine lift bracket. Remove lower intake manifold assembly.
Installation
NOTE: Refer to Fuel Injector Installation as outlined in this Section.
NOTE: The three bolts with stud head go in hole positions 2, 3 and 4.