Section 01-11: Glass, Frames and Mechanisms | 1993 Mustang Workshop Manual |
REMOVAL AND INSTALLATION
Windshield/Rear Window Glass Butyl Seal
Tools Required:
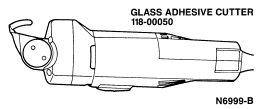
- Rotunda Glass Adhesive Cutter 118-00050
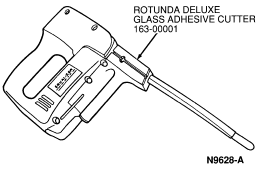
- Rotunda Deluxe Adhesive Cutter 163-00002
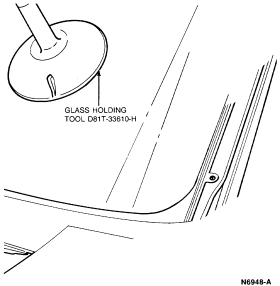
- Glass Holding Tool D81T-33610-4
Except Convertible
Removal
- Remove the windshield wiper arms and blades if the windshield is being
replaced.
- Remove exterior window mouldings and moulding retainers.
- On vehicles with a rear defroster, the heating wires must be disconnected
on both sides of the window before proceeding to remove rear window.
 WARNING: SAFETY GLASSES AND GLOVES MUST BE WORN.
- Using Rotunda Glass Adhesive Cutter 118-00050 or Rotunda Deluxe Glass
Adhesive Cutter 163-00001 or equivalent. Follow manufacturer's instructions,
cut seal and dam around entire outer edge of glass.
- Cut the butyl seal as close to the inside surface of the glass as possible.
Rotate the blade to cut the corner butyl seal.
- Remove the glass from the vehicle using Glass Holding Tool D81T-33610-H or
equivalent.
Installation
There are two procedures applicable to the installation of glass with
butyl type seal:
Procedure No. 1 should be used with Butyl Kit
D9AB-5403863-A or equivalent packaged with 8mm (5/16 inch) diameter butyl
(round type). Do not use this kit if adhesion of existing
butyl-to-pinch weld flange is unreliable, as indicated by a surface which is
not smooth and free of excessive skips, bumps and contamination.
Procedure No. 2 should be used with Butyl Kit
D9AB-5403863-A or equivalent packaged with I-beam type butyl, where complete
replacement of existing butyl is necessary.
Procedure No. 1
- Temporarily position the replacement glass in the windshield opening, using
spacers to prevent glass-to-metal contact. Adjust the glass to attain optimum
glass-to-A-pillar overlap. Adjust the lower spacers, if necessary, to attain
proper positioning at the top. A minimum of 4.76mm (3/16 inch) butyl tape to
glass contact around the periphery is required to ensure proper retention and
sealing capability.
- Make an alignment mark with a crayon on the outside of the glass and on a
corresponding point on the glass opening.
- Remove glass and thoroughly clean its edge and inside surface.
NOTE: Do not allow the new butyl to overhang the edge of the existing butyl,
and do not stretch the butyl or bridge the corners of the window opening.
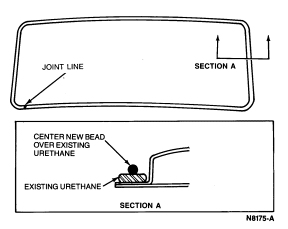
- Apply new butyl on top of existing butyl starting at bottom of glass
opening. Locate new butyl to ensure a minimum of 4.76mm (3/16 inch) contact on
the existing butyl.
- Apply Glass Primer ESB-M2G157 (furnished in the kit) or equivalent around
the perimeter of the cleaned inside surface, and edge of the glass in area that
will contact butyl seal. Allow primer to dry a minimum of one minute before
installing glass.
Primer must be agitated to be effective.
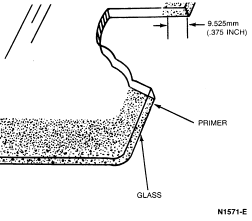
- Place glass in the opening, aligning crayon marks.
- Press the glass against the butyl with approximately 890N (200 lb)
pressure. Leave the weights in place until a 5.1mm (0.20 inch) gap between the
glass and sheet metal flange is achieved. A dull spot indicates an area where
the butyl is not contacting the glass. Additional pressure will seal such areas.
- Install the moulding retainers.
- From outside the vehicle, apply Liquid Butyl Sealer C9AZ-19554-B
(ESB-M4G162-A) or equivalent around the entire perimeter of the glass.
 CAUTION: Do not use a razor blade to clean primer from rear window defroster.
Use of razor blades, steel wool, or abrasive powders will damage grid wires.
- Remove excess primer from the inside surface of the glass with a razor
blade. Wipe the glass with a clean cloth dampened with naphtha or an equivalent.
- When the liquid sealer has "skinned-over" (approximately 10 minutes),
water-test the installation. If necessary, service any leaks with additional
liquid sealer.
- Install the mouldings, wiper arms and blades.
- On vehicles equipped with a rear window defroster, it will be necessary to
apply a piece of tape to the pinch weld flange under the wires. Connect wires
and install mouldings.
- Clean the glass and surrounding area.
Procedure No. 2
- Clean all remaining butyl from the glass opening.
- Inspect the sealing surface of the flanges for irregularities and/or
chipped or missing paint, and service, as necessary.
- Temporarily position the replacement glass in the windshield opening using
spacers to prevent glass-to-metal contact. Adjust the glass to attain optimum
glass-to-A-pillar overlap, and adjust the lower spacers, if necessary, to
attain proper positioning at the top. A minimum of 4.76mm (3/16 inch) butyl
tape-to-glass contact around the periphery is required to ensure proper
retention and sealing capability.
- Make an alignment mark with a crayon on the outside of glass and on a
corresponding point on glass opening.
- Remove glass and thoroughly clean its edge and inside surface.
- Treat sheet metal surface that will contact new butyl tape with metal
primer provided in kit. Follow instructions on tube.
Primer must be agitated to be effective.
- Start along bottom of window opening and apply butyl tape around edge of
opening. Cut butyl at required length on a 45 degree angle and carefully splice
two loose ends.
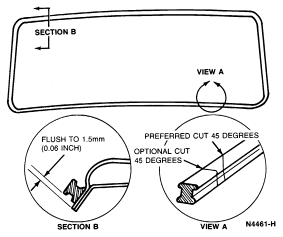
NOTE: When applying butyl tape do not allow the butyl to bridge corners of the
window opening and do not stretch the butyl.
- Apply Glass Primer ESB-M2G157 provided in the kit around the perimeter of
cleaned inside surface and edge of glass in the area that will contact butyl
seal. Allow the primer to dry a minimum of one minute before installing glass.
Primer must be agitated to be effective.

- Place glass in opening, aligning crayon marks.
- Press glass against butyl with approximately 890N (200 lb) pressure. Leave
weights in place until a 5.1mm (0.20 inch) gap between glass and sheet metal
flange is achieved. A dull spot indicates an area where the butyl is not
contacting glass. Additional pressure will seal such areas.
- Install moulding retainers.
- From outside vehicle, apply Liquid Butyl Sealer C9AZ-19554-B (ESB-M4G162-A)
or equivalent around entire edge of glass.
 CAUTION: Do not use a razor blade to clean primer from rear window defroster.
Use of razor blades, steel wool, or abrasive powders will damage grid wires.
- Remove excess primer from inside surface of glass with a razor blade, and
wipe glass with a clean cloth dampened with naphtha or an equivalent.
- When liquid sealer has "skinned-over" (approximately 10 minutes),
water-test installation. If necessary, service any leaks with additional liquid
sealer.
- Install the mouldings, wiper arms and blades.
- On vehicles equipped with rear window defroster, it will be necessary to
apply a piece of tape to pinch weld flange under wires. Connect wires and
install mouldings.
- Clean glass and surrounding area.
Windshield
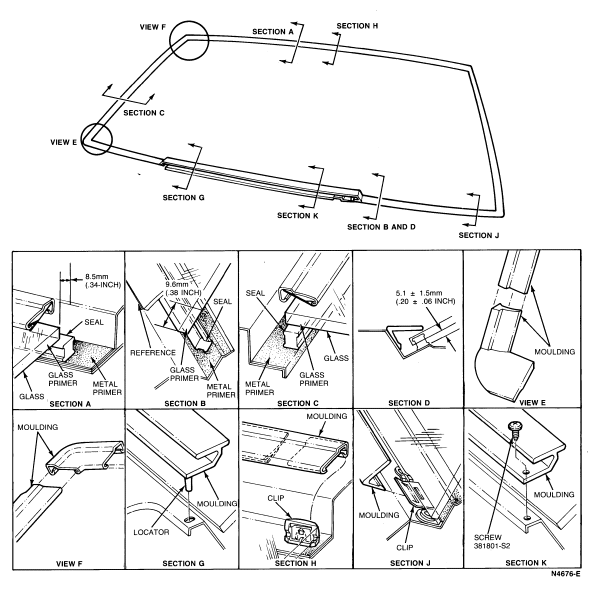
Window, Rear
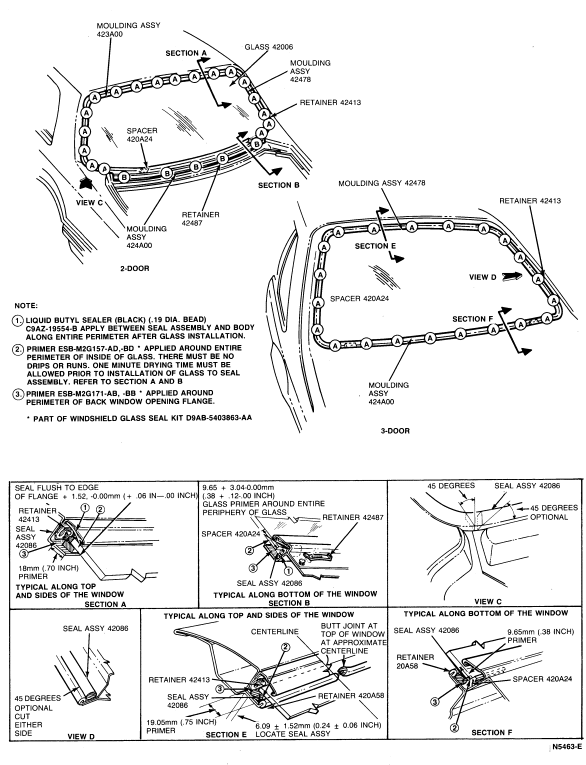
 WARNING: SAFETY GLASSES AND GLOVES MUST BE WORN.
  WARNING: SAFETY GLASSES AND GLOVES MUST BE WORN.


 CAUTION: Do not use a razor blade to clean primer from rear window defroster.
Use of razor blades, steel wool, or abrasive powders will damage grid wires.

 CAUTION: Do not use a razor blade to clean primer from rear window defroster.
Use of razor blades, steel wool, or abrasive powders will damage grid wires.
