Section 07-03: Transmission, Manual—T50D
1993 Mustang Workshop Manual
DISASSEMBLY AND ASSEMBLY

Output Shaft


Tools Required:


Disassembly

NOTE: Steps 1 and 2 are for Mustang Cobra only. All others begin with Step 3.

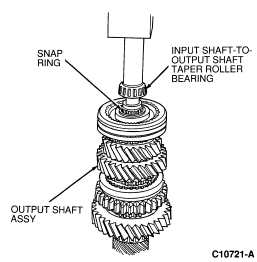
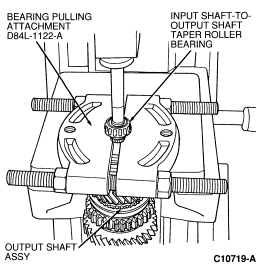
  1. Using Bearing Pulling Attachment D84L-1122-A or equivalent, press off input shaft-to-output shaft taper roller bearing.


  1. Remove snap ring.


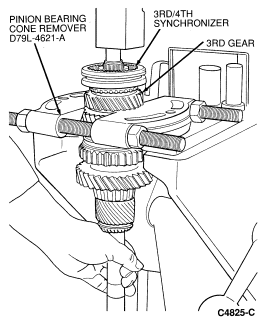
  1. Using a press and Pinion Bearing Cone Remover D79L-4621-A or equivalent, remove 3rd/4th synchronizer, 3rd speed blocking ring, and 3rd gear as an assembly.


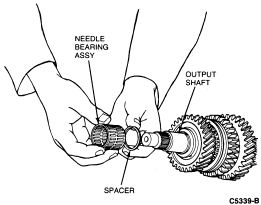
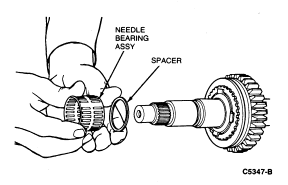
  1. Remove needle bearing assembly and spacer from output shaft.


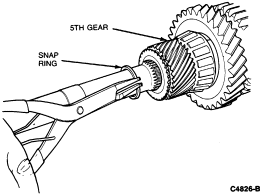
  1. Remove fifth gear snap ring.


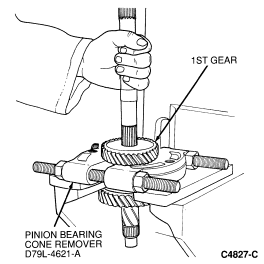
  1. Using a press and Pinion Bearing Cone Remover D79L-4621-A or equivalent, remove fifth gear.


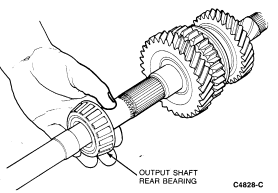
  1. Remove output shaft rear bearing.


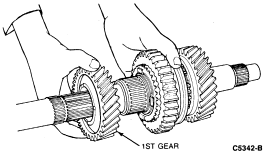
  1. Remove first gear.


    NOTE: There is a snug fit between the sleeve and the output shaft.
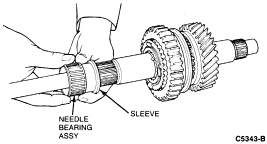
  1. Remove needle bearing assembly and sleeve.


  1. Remove roll pin using a pencil magnet.


  1. Remove three-piece first gear synchronizer blocking ring assembly from output shaft.


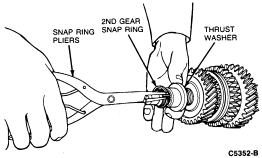
  1. Remove second gear snap ring and thrust washer.


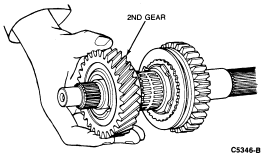
  1. Remove second gear from output shaft.


  1. Remove second gear needle bearing assembly and spacer.


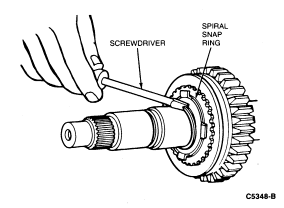
  1. Disengage spiral snap ring from slot in output shaft using a small screwdriver.


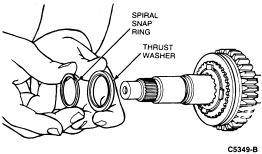
  1. Remove spiral snap ring and thrust washer from output shaft.


  1. Remove three-piece second gear synchronizer blocking ring assembly.

    Remove 1st/2nd synchronizer from output shaft.
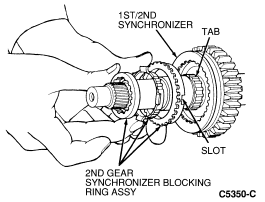


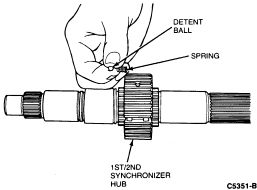
  1. Remove detent ball and spring from hub on output shaft.

    NOTE: The 1st/2nd speed synchronizer and hub is serviced only as an assembly, with the output shaft. Therefore, no attempt should be made to separate the hub from the shaft.

    The sleeve, springs and inserts may be removed from the hub after scratching or etching alignment marks on the hub and sleeve. The only parts that can be serviced are the springs, inserts and detent ball and spring. If the hub or sleeve is worn or damaged, the output shaft and synchronizer must be replaced as an assembly. Refer to Synchronizer Disassembly and Assembly.


Assembly

  1. Install detent ball and spring in 1st/2nd synchronizer hub on output shaft.


  1. Install 1st/2nd synchronizer assembly, and three-piece 2nd gear synchronizer blocking ring assembly onto output shaft.

    NOTE: Align slots in synchronizer blocking ring with tabs in 1st/2nd synchronizer.

    For synchronizer assembly, refer to Synchronizer Disassembly and Assembly.


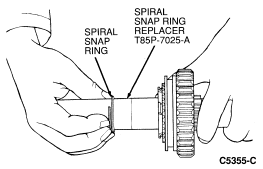
  1. Install thrust washer onto output shaft. Install spiral snap ring using Spiral Snap Ring Replacer T85P-7025-A or equivalent.


  1. Install second gear needle bearing and spacer.


  1. Install second gear onto output shaft.

    NOTE: Align slots in second gear with tabs on synchronizer blocking ring assembly.
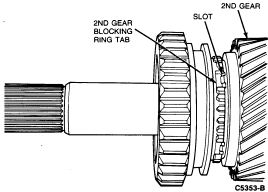


  1. Install second gear thrust washer and snap ring using snap ring pliers.


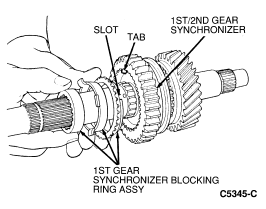
  1. Install three-piece first gear synchronizer blocking ring assembly onto output shaft.

    NOTE: Align slot in first gear synchronizer blocking ring with tab on 1st/2nd synchronizer.


  1. Drop roll pin into output shaft.

    NOTE: Use pencil magnet if necessary.
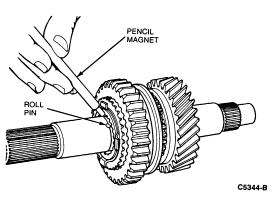


  1. While aligning notch in sleeve with roll pin, slide sleeve onto output shaft.

    Install needle bearing assembly over sleeve.
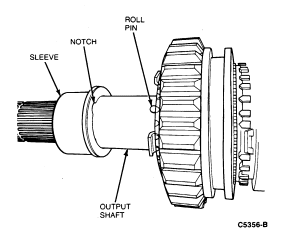


  1. Install first gear onto output shaft.

    NOTE: Align slots in first gear with tabs on first gear synchronizer blocking ring assembly.
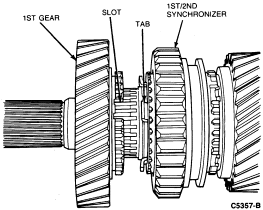


  1. Install rear output shaft bearing onto output shaft. The bearing taper must face the rear of the shaft.


     CAUTION: Ensure the output shaft and gear splines are carefully aligned. If splines are improperly aligned, damage could occur when the gear is pressed onto the output shaft.
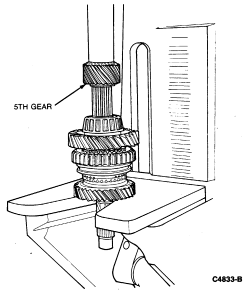
  1. Lubricate fifth gear splines with petroleum jelly and position on output shaft. Using a press and a capped length of pipe, 31.75mm ID x 356mm (1-1/4 inch ID x 14 inch) press fifth gear onto output shaft.


  1. Using snap ring pliers, install fifth gear snap ring.


  1. Install spacer and split needle bearing assembly onto output shaft.


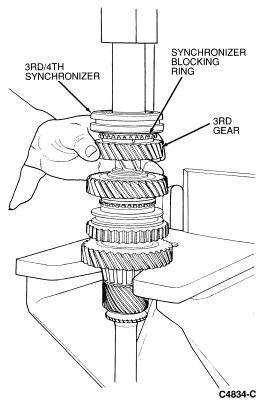
  1. Using a press and a 1-1/2 inch deep well socket, install 3rd/4th synchronizer, third gear synchronizer blocking ring and third gear as an assembly.

    NOTE: Before pressing components together, ensure the synchronizer hub faces the short end of the output shaft. Hold third gear against the synchronizer to maintain synchronizer blocking ring alignment.
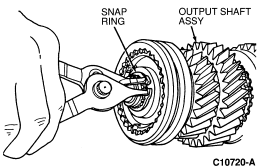


  1. For Mustang Cobra, install snap ring.


  1. For Mustang Cobra, press on input shaft-to-output shaft taper roller bearing.

     CAUTION: Make sure bearing is fully seated against snap ring.