Section 07-03: Transmission, Manual—T50D | 1993 Mustang Workshop Manual |
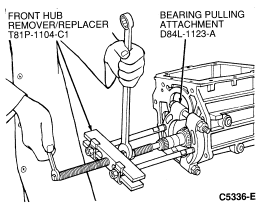
Tools Required:
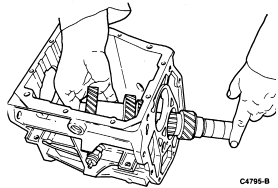
Disassembly
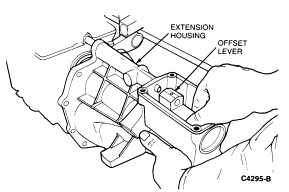
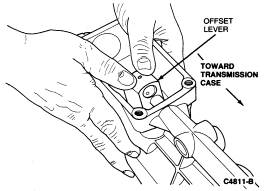
 CAUTION: Do not attempt to remove the offset lever while the extension housing
is bolted in place. A lug, located on the bottom of the offset lever, meshes
with the detent plate preventing enough rearward movement of the offset lever
to allow removal.
CAUTION: Do not attempt to remove the offset lever while the extension housing
is bolted in place. A lug, located on the bottom of the offset lever, meshes
with the detent plate preventing enough rearward movement of the offset lever
to allow removal.
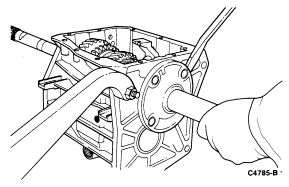
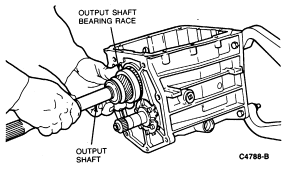
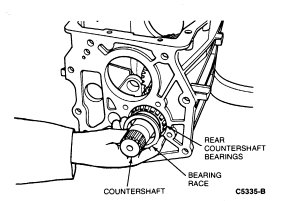
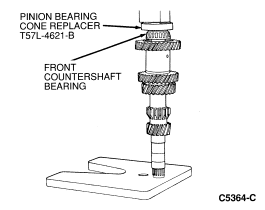
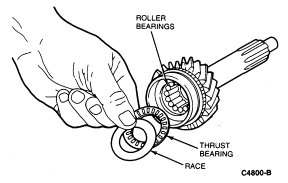
NOTE: If the race sticks, it is probably misaligned in the case bore. To free the race, work the shaft back and forth in the case.

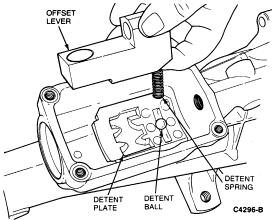
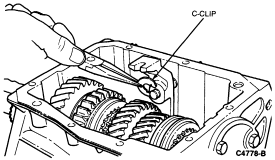
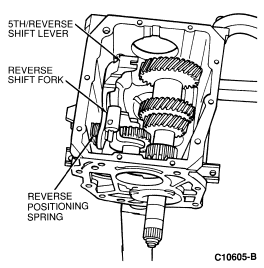
NOTE: Observe location of shift lever, shift fork and inhibitor spring prior to removal. Also observe the rotation action of the reverse positioning spring during removal. This will be helpful during assembly.
NOTE: If the race sticks, it is probably misaligned in the case bore. To free the race, work the shaft back and forth in case.
Assembly
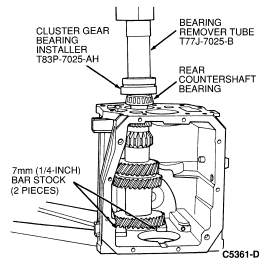
CAUTION: Failure to properly support the countershaft can result in permanent
distortion of the case during bearing installation.
NOTE: Support the countershaft using two pieces of 7mm (1/4 inch) bar stock.
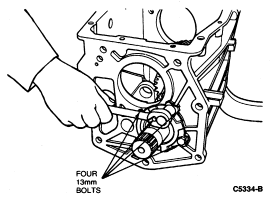
NOTE: This should be done initially without any shims installed. Tighten bolts to 15-27 Nm (11-20 lb-ft).
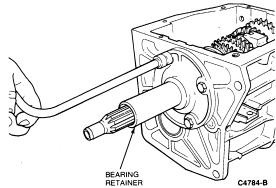
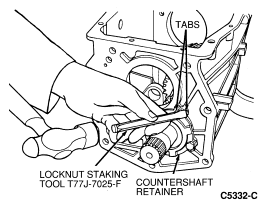
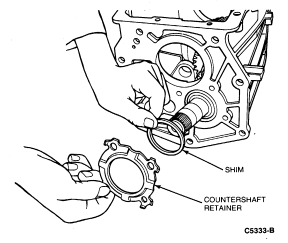
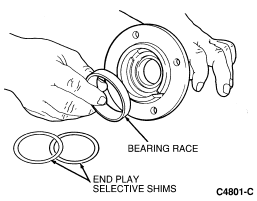
Remove retainer and install necessary shim(s) between
countershaft retainer and rear countershaft bearing race. Verify end play is
within 0.0254-0.127mm (0.001-0.005 inch). After installing countershaft
retainer, bend tabs on retainer over the four attaching bolts. 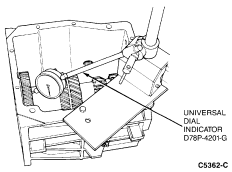
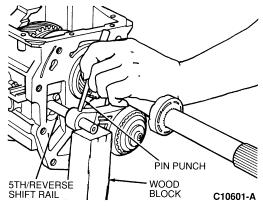
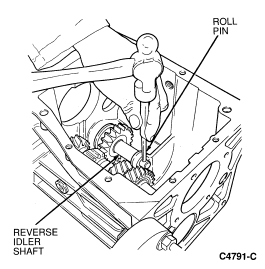
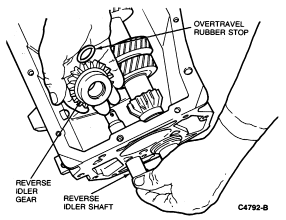
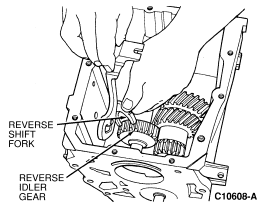
Install reverse idler shaft and rubber overtravel stop.
Install shaft from rear of case and position overtravel stop between gear and
shaft support.
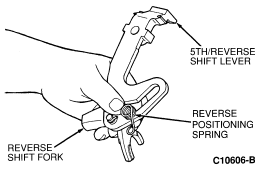
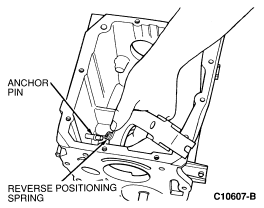
NOTE: Observe reverse positioning spring rotation. Reverse positioning spring should rotate counterclockwise into its installed position.
NOTE: The following step is not required for Mustang Cobra.
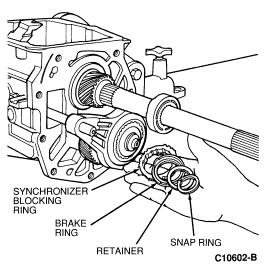
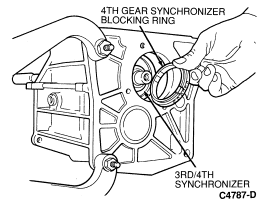
NOTE: Ensure 3-4 synchronizer blocking ring is still in proper position.
NOTE: Do not install end play shims at this point.
NOTE: Ensure tabs on retainer engage splines of countershaft.

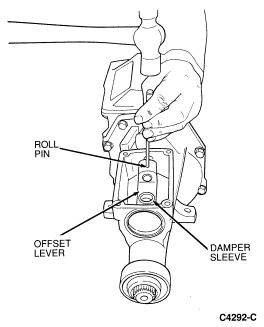
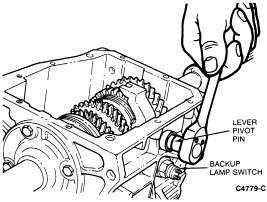
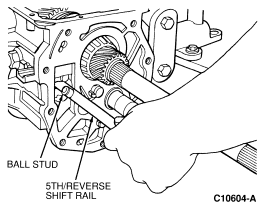
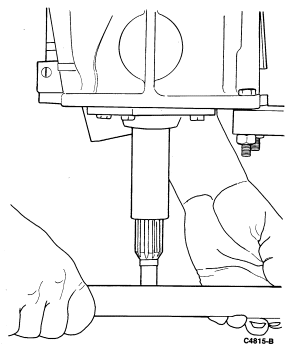
NOTE: Before installing the pivot pin, ensure the shift rail ball stud is fully engaged with the shift lever.
Tighten pivot pin to 34-47 Nm (25-35 lb-ft)
using a T55 Torx® driver. Apply Pipe Sealant with
Teflon® D8AZ-19554-A (ESG-M4G194-A and ESR-M18P7-A) or
equivalent to the backup lamp switch and install using a 22mm socket. Tighten
to 27-47 Nm (20-35 lb-ft). 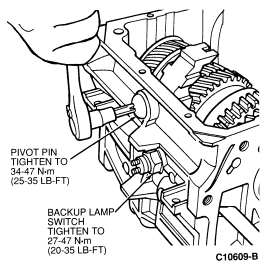
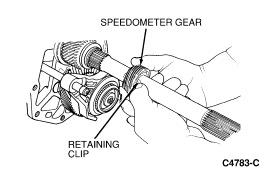
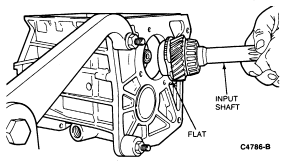
NOTE: The tab on the retainer clip engages a hole in the output shaft.
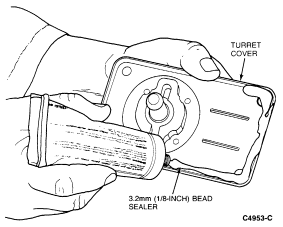
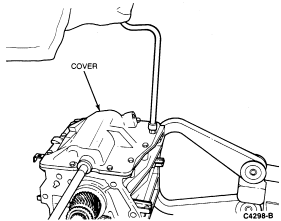
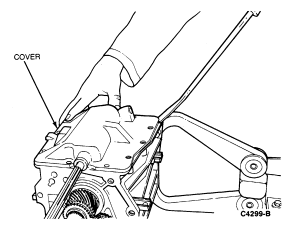
CAUTION: Do not apply silicone sealer to top of transmission case surface under
any circumstances, as sealant could fall into transmission and affect operation.
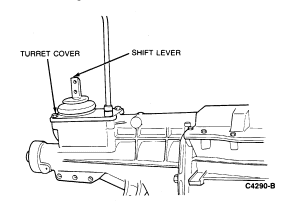
NOTE: Ensure all synchronizers are in the NEUTRAL position and that the shift forks in the cover are in the NEUTRAL position.
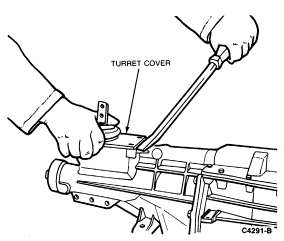
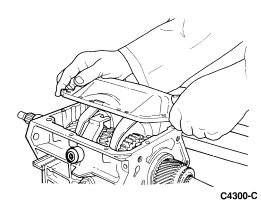
Position cover to filler plug side of transmission and lower into position until shift forks engage synchronizers. Continue lowering cover and move into position to engage fifth/reverse shift lever.
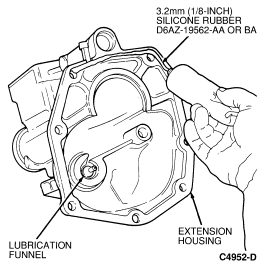
NOTE: Make sure lubrication funnel engages into fifth gear synchronizer.
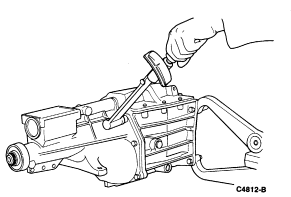
Install damper sleeve in offset lever.
NOTE: Output shaft geartrain end play must be checked and adjusted at this point.
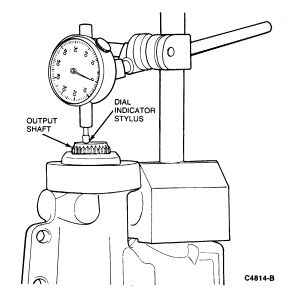
NOTE: A shim must be installed that is the thickness of the dial indicator reading. This will provide zero end play.
CAUTION: Although zero end play is the ideal end play specification, a plus or
minus .050mm (0.002 inch) is an acceptable tolerance. Do not overload the
bearings with too thick a shim.
CAUTION: Thickest shim must be installed closest to the front bearing cup.

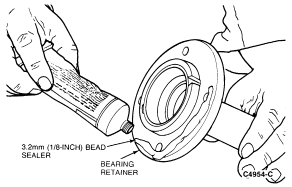
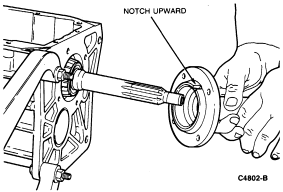
Install bearing retainer with narrow or smaller notch facing upward, and tighten retaining bolts to 15-27 Nm (11-20 lb-ft). Check end play.
CAUTION: The sealer must not cover the notch in the bearing retainer.