Working inside vehicle, install inner nylon washer, booster push rod and
bushings on brake pedal pin.
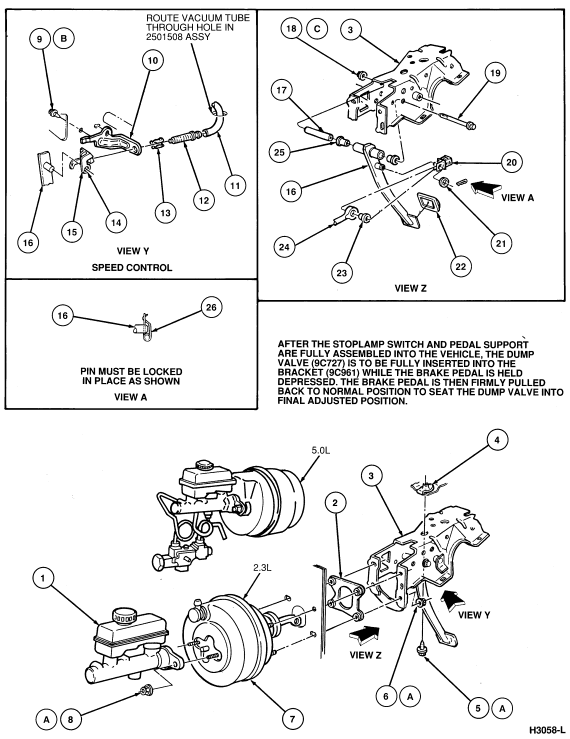
Vehicles equipped with speed control:
Place speed control amplifier bracket over lower outboard booster stud and
position bracket locating tab in hole provided in brake pedal support.
Secure the booster-to-dash panel retaining nuts, and tighten
to 21-29 Nm (16-21 lb-ft). Position stoplamp switch, so that
it straddles booster push rod with switch slot toward pedal blade and hole just
clearing pin. Slide stoplamp switch completely onto pin. Be careful not to bend
or deform switch. Install nylon washer on pin, and secure all parts to pin with
hairpin retainer. Make sure retainer is fully installed and locked over pedal
pin. Install stoplamp switch wiring connector on stoplamp switch.
 CAUTION: The fuel system is under pressure and must be bled prior to
disconnecting the quick connect fittings. Refer to
CAUTION: The fuel system is under pressure and must be bled prior to
disconnecting the quick connect fittings. Refer to