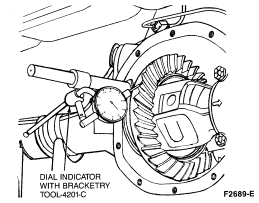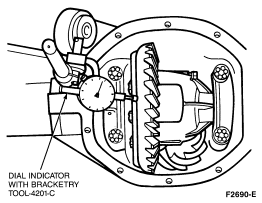
Ring Gear Runout Check

Section 05-00: Axle and Driveshaft—Service | 1993 Mustang Workshop Manual |
Integral Carrier
Inspect the differential case assembly and drive pinion before they are removed from the carrier casting. These inspections can help find the cause of the trouble and determine the correction needed.
Ring and Pinion Backlash Check
This indicates runout conditions that will not show up in other tests.
Remove the axle cover. Refer to Section 05-02A or 05-02B depending on axle
size. Measure ring gear backlash on 30 consecutive ring gear teeth using Dial
Indicator with Bracketry TOOL-4201-C or equivalent. Note the variation between
the high and low readings. If over 0.10mm (0.004 inch), replace the gearset.
Install the axle cover plate. 
Ring Gear Runout Check
