NOTE: The snap ring must be removed and installed after the reading is completed.
Section 04-00: Suspension—Service | 1993 Mustang Workshop Manual |
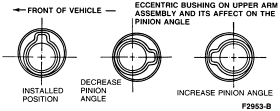
Double Upper Arms
Tools required:
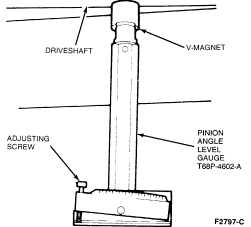
A load must be applied to attain a curb height as shown on the pinion angle chart. This height is measured from the top of the axle housing tube to the jounce bumper bracket on the bottom of the side rail.
NOTE: The snap ring must be removed and installed after the reading is completed.
If the pinion angle is not within specification, install service upper control arms (may not be available for all vehicles, check with your dealer) equipped with cams. Adjust pinion angle as follows:
NOTE: If the cam (located in the bushing inner sleeve) appears to be rusty, tap the cam with a drift to remove the rust, so the cam will rotate.
NOTE: LH and RH upper arms must have same setting.